
How to replace car cabin air filter is one of those small maintenance jobs that feels intimidating until you see how simple it usually is, and if your AC smells musty or airflow feels weak, this is a smart first fix.
A clogged cabin filter can make the HVAC work harder, trap odors, and push dust and pollen back into the cabin, which is especially annoying for allergy season or long commutes. The good news, many vehicles make the filter accessible behind the glove box, no shop visit needed.
There are a couple gotchas though, like installing the airflow direction backwards or buying the wrong size. This guide keeps it practical: quick diagnosis, what to buy, a 10-minute swap process, and what to do if your car makes it harder than average.
What the cabin air filter actually does (and why it matters)
The cabin air filter sits in the HVAC air path, cleaning the air that enters the passenger compartment through the vents. Depending on filter type, it can capture dust, road grit, pollen, and sometimes odors.
According to the U.S. Environmental Protection Agency (EPA), particulate matter is a common air pollutant, and reducing particle exposure is generally helpful, especially for people sensitive to allergens. A cabin filter is not a medical device, but it often reduces how much stuff ends up circulating in the cabin.
What a fresh filter typically improves:
- Stronger airflow at the same fan setting
- Less “dirty sock” smell when the system starts
- Less dust/pollen entering through vents
Common signs it’s time to replace it
Most people wait until airflow is obviously weak, but you can usually catch it earlier. If you’re trying to decide whether how to replace car cabin air filter is worth doing today, these are the signals that show up in real life.
- Reduced vent airflow, especially on higher fan speeds
- Musty or stale odor when you turn on AC or heat
- More sneezing/irritation in the car than usual (can be seasonal, so use judgment)
- Visible debris on the old filter edges if you peek inside the access door
- Whistling fan noise that changes with fan speed, sometimes caused by restriction
One nuance: if your airflow is weak on one vent but fine on others, that might be a vent door issue, not a filter. A clogged filter usually affects the whole system.
Before you start: tools, parts, and picking the right filter
You rarely need tools beyond your hands, but it depends on the car. Many glove-box setups use plastic tabs, while some cars use a couple screws.
Quick prep list
- New cabin air filter (exact match for year/make/model/trim)
- Flashlight (helps you see airflow arrows and guides)
- Small trim tool or flat screwdriver (only if your cover uses clips that fight back)
- Optional: shop vacuum for leaves in the filter tray
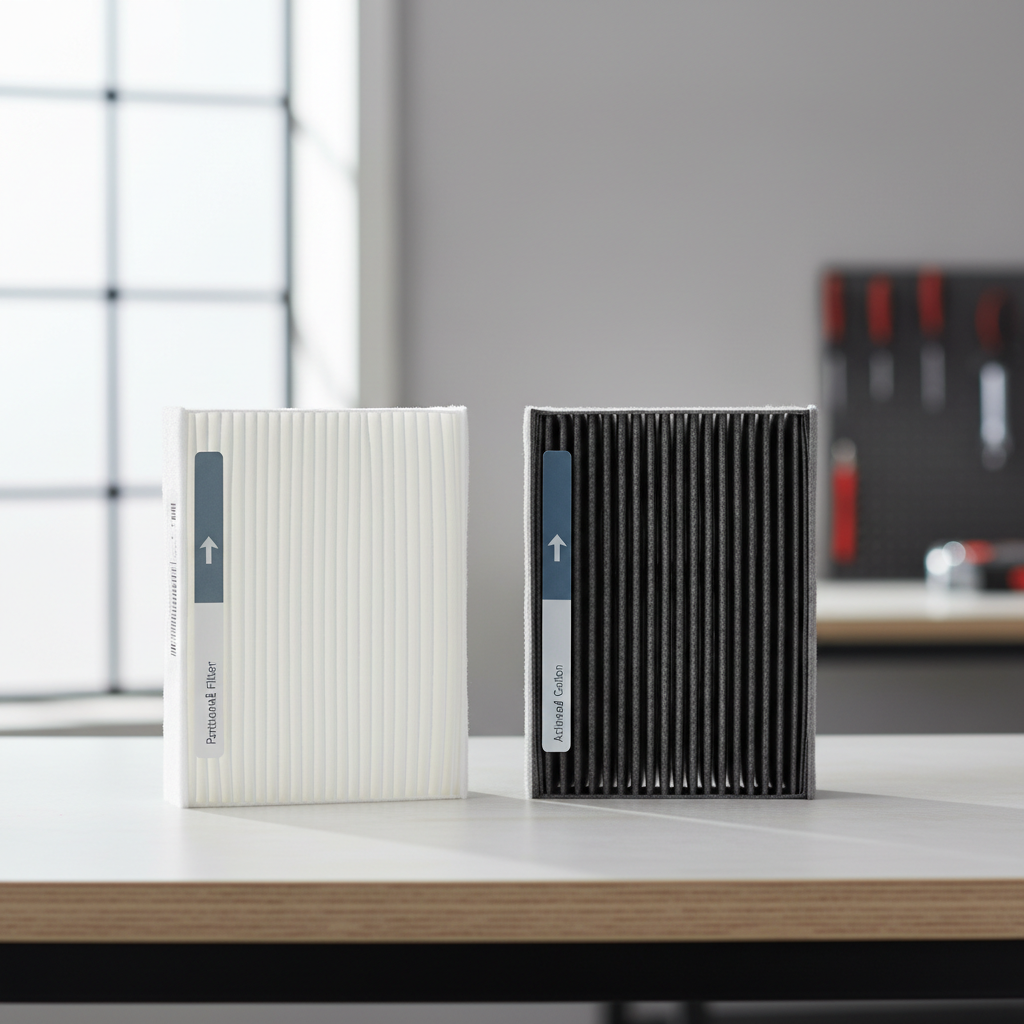
Filter choice is mostly about what bothers you:
- Standard particulate: good everyday option, usually cheaper
- Activated carbon: helps with odors and some fumes, often worth it for city driving
Also, confirm whether your car uses one filter or a “two-piece” set. Many listings mention this clearly, but it’s easy to miss when you’re shopping quickly.
10-minute step-by-step: how to replace the cabin air filter
Most cars follow a similar path: access the filter housing, slide the old filter out, clean the tray, then install the new one with the correct airflow direction. If you’ve never done it, this is the version that keeps you moving without overthinking.
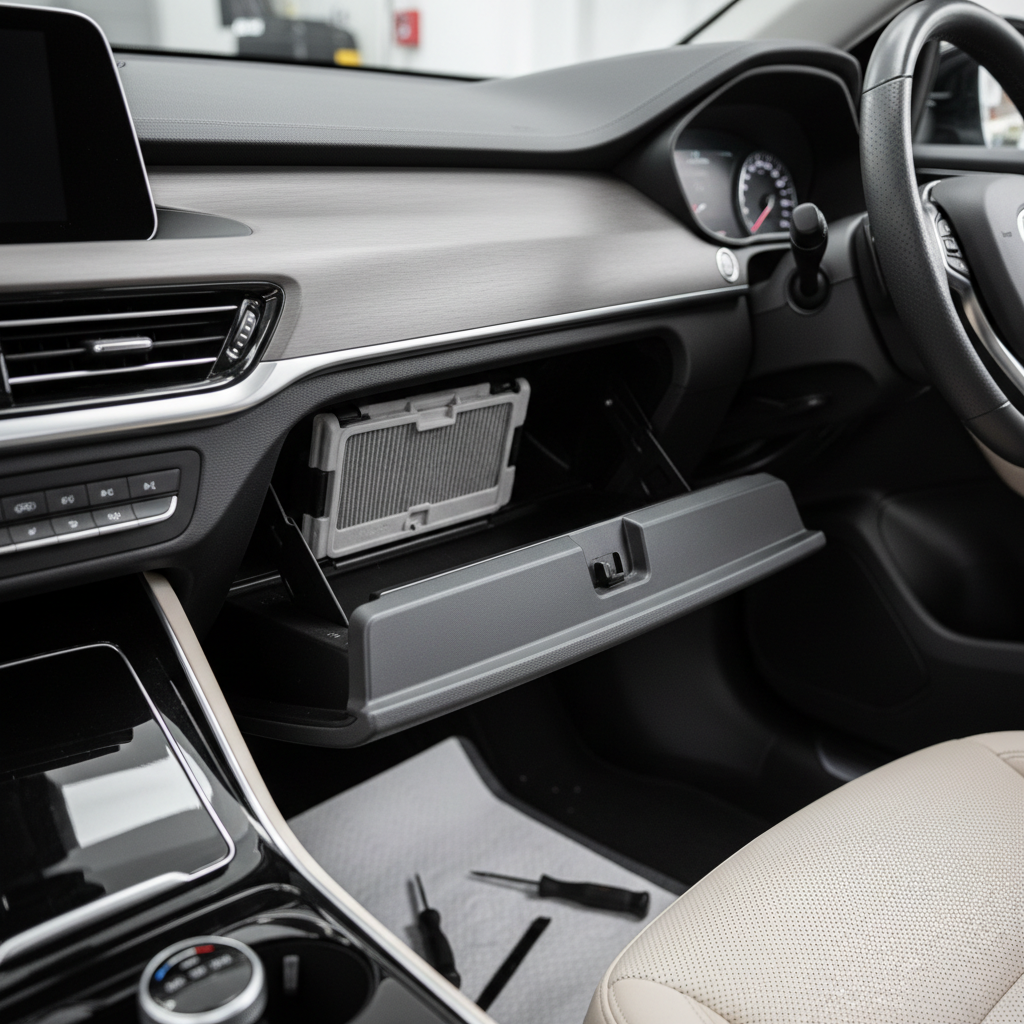
Step 1: Locate the filter housing
Common locations are behind the glove box, under the passenger-side dash, or at the base of the windshield under the cowl. For many vehicles, you’ll open the glove box, press the side stops inward, and let it swing down.
Step 2: Open the filter door
Look for a rectangular cover with clips. Release the tabs gently. If the plastic feels brittle, slow down, cold plastic breaks easier.
Step 3: Slide the old filter out (watch the debris)
Pull the filter straight out. If it’s packed with leaves, tilt it slightly upward to avoid dumping debris into the blower area.
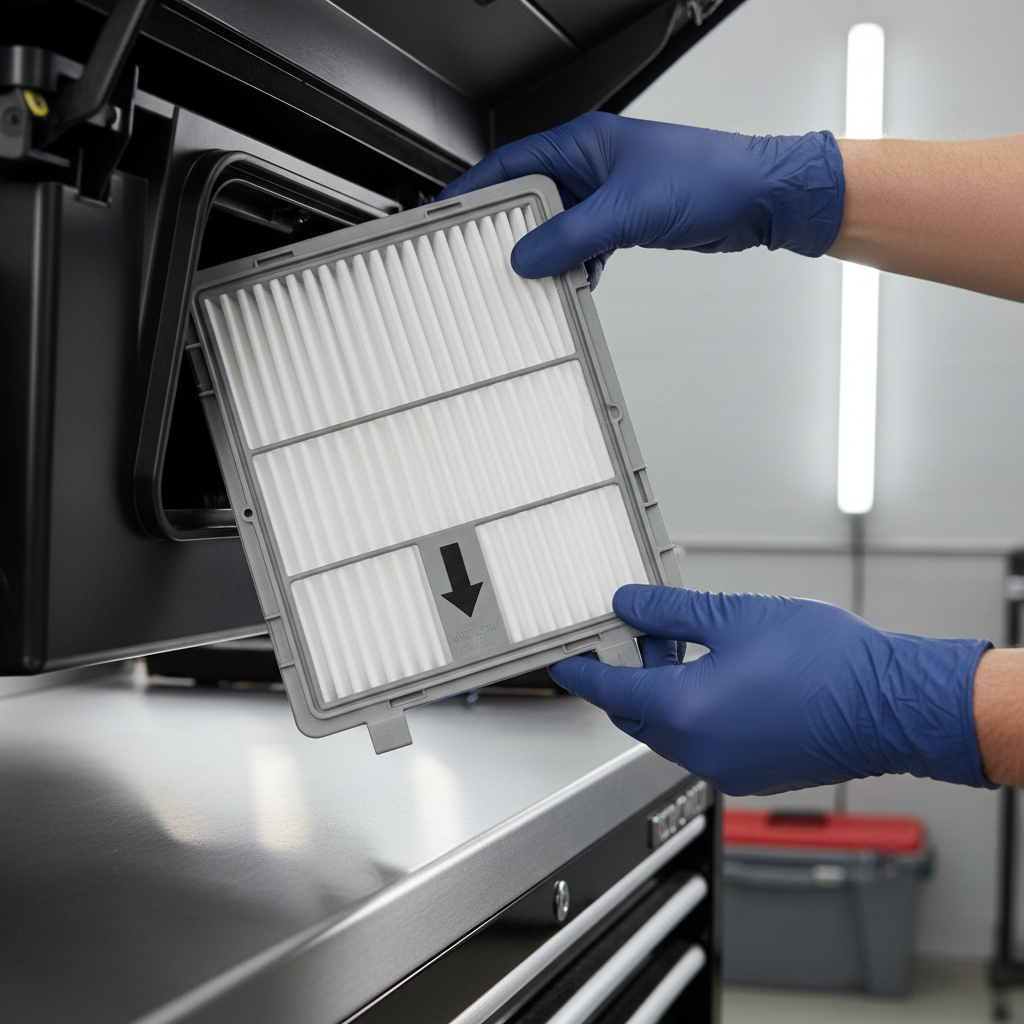
Step 4: Check airflow direction
Most filters have an airflow arrow. Before removing the old one completely, note which way the arrow points. Installing the new filter backwards is a classic mistake and can reduce performance.
Step 5: Clean the tray lightly
Vacuum out loose debris. Skip harsh cleaners. If you see moisture, address it later, it can indicate drain issues or AC evaporator condensation patterns.
Step 6: Install the new filter and reassemble
Slide the new filter in without crushing the pleats. Close the door until the tabs click, then lift the glove box back into position.
Quick check: start the fan, cycle from low to high. You’re listening for rubbing, rattles, or a cover that isn’t fully seated.
Self-check: are you in the “easy swap” group or the “plan a bit more” group?
This quick table helps you decide whether you can realistically finish in 10 minutes or you should budget more time.
| What you see | What it usually means | Time expectation |
|---|---|---|
| Glove box drops down, filter door is obvious | Standard access design | ~10 minutes |
| Plastic clips hidden, door feels tight | Fussy tabs, but still DIY-friendly | 10–20 minutes |
| Access under dash with panels | More trim removal, awkward angles | 20–40 minutes |
| Filter seems wet or you see standing water | Possible drain or moisture issue | Replace filter + investigate |
Mistakes that waste time (or make the air worse)
Most DIY problems come from rushing the “small” details. If you’ve been searching how to replace car cabin air filter and still feel stuck, it’s often one of these.
- Wrong filter size: close enough is not enough, gaps let unfiltered air bypass
- Airflow arrow backwards: can reduce airflow and increase noise
- Crushed pleats: happens when you force it past guides, performance drops
- Leaving leaves in the tray: can trigger odors fast, especially with humidity
- Breaking glove box stops: use gentle pressure, don’t pry aggressively
If your car has persistent musty odor even after replacement, the filter may not be the main cause. Often it’s moisture on the evaporator core or a clogged drain. That’s not always a DIY job, and it varies a lot by model.
When it makes sense to get professional help
Replacing the filter itself is usually safe, but there are a few situations where you might prefer a shop or at least a second opinion.
- Electrical connectors or sensors attached to panels you must remove
- Mold concerns or ongoing respiratory irritation, a technician can check drain function and evaporator condition, and you may want to consult a medical professional for health questions
- Broken tabs or missing covers that cause air leaks or rattles
- Water intrusion around the cabin filter area after rain
According to the National Highway Traffic Safety Administration (NHTSA), proper vehicle maintenance supports safe operation. While a cabin filter is not a primary safety component like brakes, addressing maintenance issues early tends to prevent distracting odors, fogging complaints, and HVAC performance problems that can snowball.
Key takeaways and a simple plan for today
If your vents smell off or airflow feels lazy, replacing the cabin filter is a high-value first step that many drivers can finish quickly. Buy the correct part, match the airflow arrow, and take 30 seconds to clean out the tray, that’s usually where the win is.
- Do it now if airflow is weak or you notice musty odor at startup
- Upgrade to carbon if fumes and smells bother you in traffic
- Escalate if the new filter gets wet or odors return fast
If you want one action item, pull the old filter today and look at it. Even before you install a new one, that quick peek tells you a lot about what your HVAC has been breathing.
FAQ
How often should I replace a cabin air filter in the U.S.?
Many vehicles land somewhere around 12 months or 12,000–15,000 miles, but dusty roads, wildfire smoke, heavy traffic, and allergy season can shorten that. If airflow drops early, replace it early.
Is it safe to drive with a dirty cabin air filter?
Usually the car still drives fine, but HVAC performance can suffer and odors can build up. If defogging performance feels worse, that’s a practical reason to address it sooner.
Why does my new cabin filter still smell bad?
Often the odor source is moisture on the evaporator or debris deeper in the HVAC box, not just the filter. If the smell returns quickly, consider an HVAC inspection or an evaporator cleaning service.
Do I need an activated carbon cabin air filter?
Not mandatory. Carbon filters often help with exhaust smells and general funk, but if your main issue is dust or pollen, a standard filter can be perfectly fine.
How do I know which direction the filter goes?
Look for the airflow arrow printed on the filter frame. If you’re unsure, match the old filter orientation before removal, then confirm the housing often has an arrow too.
Can replacing the cabin air filter improve AC performance?
It can improve airflow, which feels like stronger AC, but it won’t fix a refrigerant leak or a failing compressor. If air is cold but weak, the filter is a likely culprit; if air is warm, you may need diagnosis.
What if I can’t find my cabin air filter?
Some trims don’t include one, and some hide it under the cowl area. Search your owner’s manual index for “cabin air filter” or “pollen filter,” and if access requires wiper removal, a shop visit might save frustration.
If you’re trying to make this even more straightforward, a quick parts lookup by VIN and a short model-specific access checklist can save you from ordering the wrong filter or fighting hidden clips, especially on cars with under-dash panels.