
How to fix car wheel speed sensor fault code usually comes down to one of three things: a dirty sensor, damaged wiring, or a failing wheel bearing/tone ring that confuses the signal.
If you’re seeing an ABS light, traction control light, or a scan tool message pointing to a specific wheel, it’s worth handling sooner rather than later. In many cars, the wheel speed signal feeds ABS, traction control, stability control, and sometimes even the speedometer.
The good news is you can often narrow the cause without immediately replacing parts. The bad news is that “sensor code” does not always mean “bad sensor,” and that’s where people waste time and money.
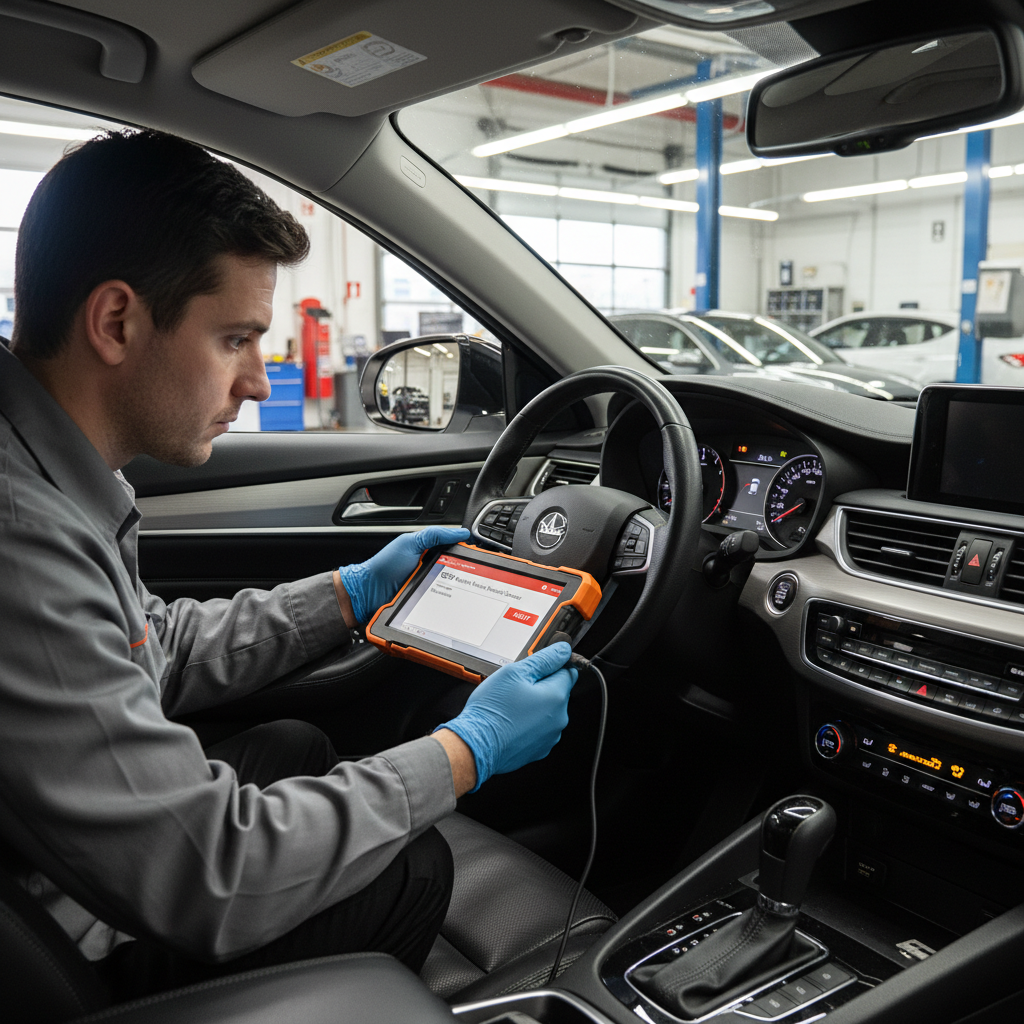
What a wheel speed sensor fault code really means
A wheel speed sensor measures how fast each wheel turns. Your ABS module compares those signals; if one wheel looks “wrong” compared to the others, it sets a fault code and may disable certain features.
According to NHTSA, ABS is designed to help drivers maintain steering control during hard braking, but it does not necessarily shorten stopping distance in all conditions. So if the ABS system disables itself due to a fault, your base brakes still work, but ABS and stability features may not.
- Common symptoms: ABS light, traction/stability light, intermittent ABS activation at low speed, speedometer issues (some models), stored DTCs like C0035/C0040-style codes (naming varies by make).
- What the code usually indicates: the module is seeing an implausible signal, an open/short in the circuit, or no signal at all.
Root causes in real-world repairs (most common first)
In a shop workflow, the fastest wins tend to be simple physical issues near the wheel: corrosion, torn insulation, loose connectors, or debris stuck to a magnetic sensor tip.
- Contamination at the sensor tip: metal shavings, road grime, or rust can weaken the signal, especially on magnetic sensors.
- Damaged wiring near the knuckle: the harness flexes with steering and suspension travel, so broken strands inside the insulation are common.
- Connector corrosion or water intrusion: green crusty pins, loose fit, or backed-out terminals cause intermittent dropouts.
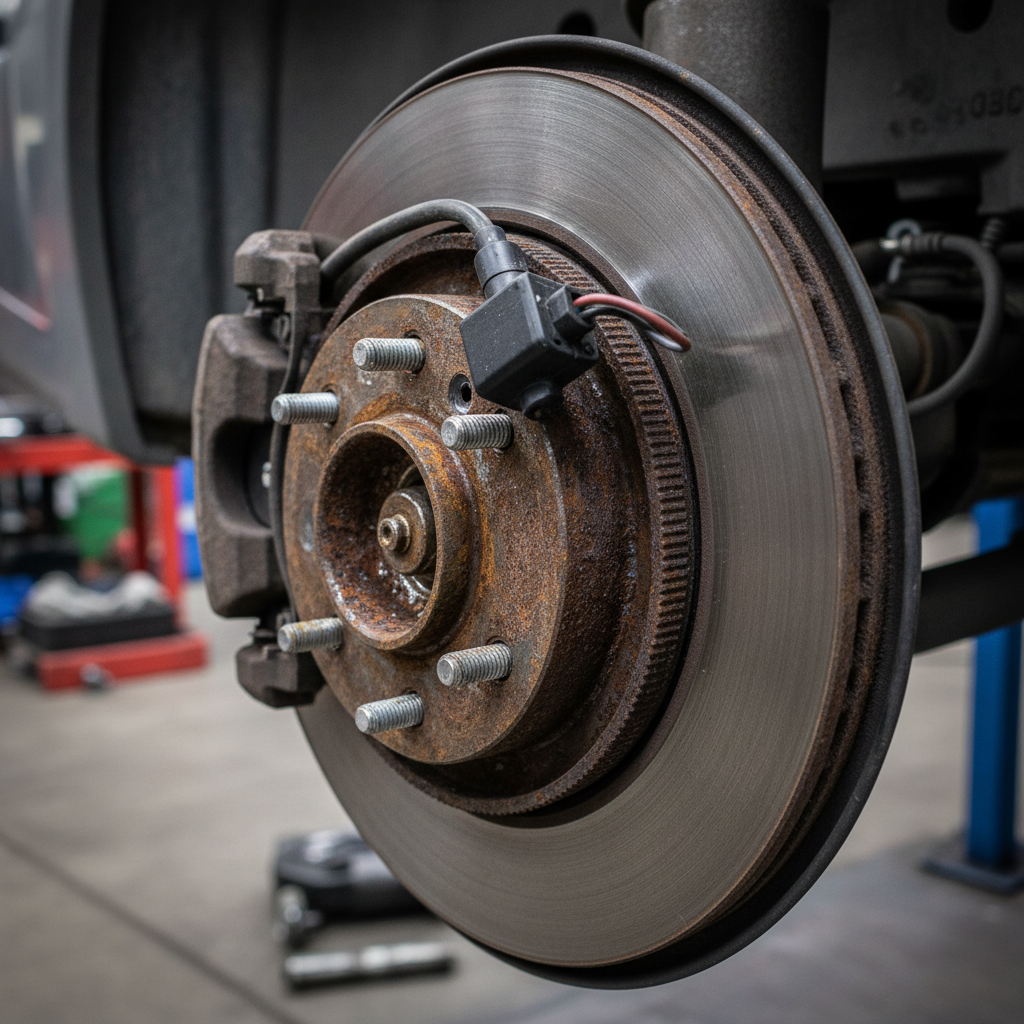
- Tone ring/reluctor problems: cracked reluctor ring, missing teeth, heavy rust buildup, or a ring that slipped on the axle.
- Wheel bearing play: many vehicles integrate the tone ring into the hub bearing; a failing bearing can distort the air gap and create erratic readings.
- Actual sensor failure: it happens, just not as “automatic” as the code wording makes it sound.
Quick self-check checklist (10–20 minutes)
Before you buy a sensor, do a quick pass. These checks catch a lot of “false sensor” replacements.
- Confirm the wheel location from the code and freeze-frame data (LF/RF/LR/RR). Don’t guess based on where the noise seems to come from.
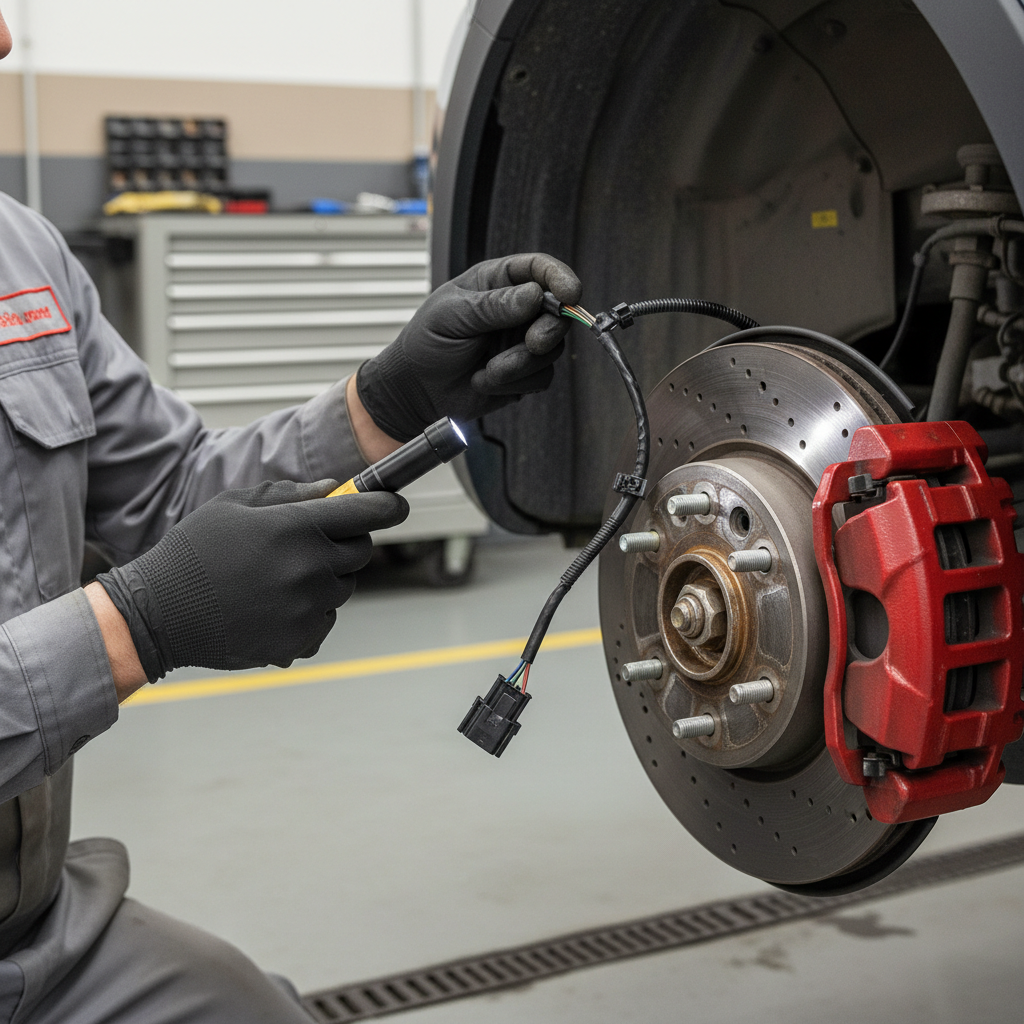
- Look for obvious harness damage at the wheel well: rubbing, pinch points, cracked insulation, missing clips.
- Unplug and inspect the connector: bent pins, corrosion, moisture, loose locking tab.
- Check the sensor seating: if it’s not fully seated (rust under the flange is common), the air gap may be off.
- Scan live wheel speed data (if you have a tool that supports it): during a slow drive, one wheel dropping to 0 mph or spiking is a clue.
If the code is intermittent and shows up after rain, car wash, or snow, suspect moisture at the connector or a wire break that opens when the suspension moves.
Tools and parts you may need (and what you can skip)
You don’t need a full lab setup, but the right tool prevents a lot of blind swapping.
- Basic: jack + stands, lug wrench, flashlight, small pick, brake cleaner (sensor-safe), rags, zip ties.
- Helpful: OBD2 scanner with ABS live data, digital multimeter, small wire brush, dielectric grease (for connector sealing, used sparingly).
- Sometimes required: hub puller or slide hammer (if sensor is seized), torque wrench (for hub/knuckle hardware), new clips/retainers.
Skip “parts cannon” shopping. A random sensor replacement can work, but if the real issue is a cracked tone ring or a hub bearing, the code often returns.
Fix paths by scenario (step-by-step)
Scenario A: Dirty sensor tip or rust lifting the sensor
This is common in rust-belt states. You remove the sensor and it looks fine, but the mounting surface has scale that pushes it outward.
- Safely lift the vehicle, remove the wheel, and locate the sensor at the hub/knuckle.
- Unplug the connector and remove the sensor bolt.
- Gently twist and pull; don’t pry hard on plastic. If it’s stuck, penetrating oil and patience beat snapping it.
- Clean the sensor tip with brake cleaner and a soft rag.
- Clean the mounting bore/flange area so the sensor sits flush again.
- Reinstall, secure the harness in its clips, clear codes, and test drive.
Scenario B: Wiring/connector issue
If live data drops out when you turn the wheel or hit bumps, wiring is high on the list.
- Follow the harness from the sensor toward the body, looking for rub-through points.
- Check the connector pins for corrosion; clean as appropriate and ensure a tight fit.
- With a multimeter, check for obvious open/short conditions (procedures vary by vehicle; if unsure, use a service manual).
- If there’s a damaged section, repair with proper automotive wire, sealed heat-shrink, and strain relief.
Small detail that matters: make sure the harness is routed exactly like factory. A “working” repair that leaves slack near the tire can turn into a repeat failure.
Scenario C: Tone ring/reluctor or wheel bearing problem
When the sensor checks out but the reading is still erratic, the “target” it reads may be the problem.
- Inspect the tone ring (if visible) for cracks, missing teeth, or heavy rust buildup.
- Check for wheel bearing play: with the wheel off the ground, grasp at 12 and 6 o’clock and feel for looseness (some vehicles need a more specific test).
- If the tone ring is integrated into the hub, a hub/bearing assembly replacement is often the real fix.
After replacement, torque specs matter. Under- or over-torquing axle nuts can shorten bearing life or cause sensor gap issues.
Scenario D: Sensor failed electrically
If the wiring is intact, connector clean, sensor seated, and the signal stays dead, replacement makes sense.
- Use an OEM or reputable brand sensor when possible; some vehicles are picky about signal quality.
- Match the sensor type (active vs passive). Don’t assume they’re interchangeable.
- Clear codes and verify live wheel speed readings during a short drive.
Troubleshooting table: symptoms → likely cause → next move
| What you notice | More likely causes | What to do next |
|---|---|---|
| ABS/traction lights on steadily, code points to one wheel | Connector corrosion, broken wire, sensor failure | Inspect connector/harness, then confirm live data on that wheel |
| ABS activates at very low speed (stopping) on dry pavement | Rust lifting sensor, weak signal, bearing play | Remove/clean sensor seat, inspect hub/bearing and tone ring |
| Code returns after sensor replacement | Tone ring/hub issue, wiring break further up, wrong sensor | Check tone ring, verify routing, inspect harness to module, confirm correct part |
| Fault happens only in rain or after washing | Water intrusion in connector, cracked insulation | Dry/clean connector, check seals, repair wire, apply light dielectric grease |
| Multiple wheel speed codes at once | Power/ground issue, ABS module wiring, low system voltage | Check battery/charging health, fuses, grounds, then ABS power supply tests |
Common mistakes that keep the code coming back
- Replacing the sensor without checking the seat: rust under the flange changes the air gap, and the new sensor reads just as poorly.
- Ignoring harness clips: a dangling wire can rub through within weeks.
- Mixing up wheel locations: left/right gets reversed more often than people admit.
- Not verifying with live data: clearing a code isn’t proof the signal is healthy.
- Using the cheapest sensor available: some aftermarket sensors work fine, others create noisy signals that modules reject.
When to stop DIY and get professional help
If you’re not comfortable lifting a vehicle safely, that alone is a reason to hand it off. Also consider a shop visit when:
- ABS and brake warning lights appear together, or braking feel changes. Driving may still be possible, but it’s smarter to get it checked quickly.
- You have multiple wheel speed sensor codes plus communication or voltage codes, which can point to power/ground or module-level issues.
- The sensor is seized and you risk damaging the knuckle or hub during removal.
- You replaced parts and the fault persists; a technician with a scope can confirm signal shape, not just “present/absent.”
According to AAA, maintaining tires and braking components is a key part of keeping vehicles roadworthy, and warning lights deserve timely attention even when the car “seems fine.” If you’re unsure, a diagnosis appointment can be cheaper than repeated guesses.
Key takeaways and a practical next step
Most people asking how to fix car wheel speed sensor fault code get the fastest results by checking the connector and harness first, then cleaning the sensor and its mounting surface before buying parts. When the code keeps returning, start thinking hub bearing or tone ring, not just electronics.
Action step: pull ABS live data on a slow drive and watch for one wheel dropping out, then inspect that wheel’s wiring and sensor seat the same day. It’s the shortest path from “warning light” to a confirmed fix.
FAQ
Can I drive with a wheel speed sensor fault code?
Often you can drive, because normal braking still works, but ABS, traction control, and stability control may be limited or disabled. If the red brake warning light is on or braking behavior changes, it’s safer to stop and consult a professional.
Will clearing the code fix the problem?
Clearing the code only resets the warning temporarily. If the underlying signal problem remains, the module usually re-detects it on the next drive cycle and the light returns.
How do I know which wheel speed sensor is bad?
A scan tool that shows the specific wheel and live wheel speed readings helps. If one wheel reads 0 mph or spikes while others look steady at low speed, that corner is the best place to start checking wiring, connector condition, and sensor seating.
Why did the code return after I replaced the sensor?
This is common when the real issue is rust under the sensor, a damaged harness further up the line, or a tone ring/hub bearing problem. Double-check routing and clips, inspect the hub area, and confirm the replacement sensor matches the correct type.
How much does it usually cost to fix a wheel speed sensor issue?
It varies by vehicle and cause. Cleaning and reseating can be minimal, while a hub bearing replacement is typically more expensive due to labor. A paid diagnostic can sometimes prevent buying the wrong part.
Do I need to replace the hub bearing if I have a sensor code?
Not automatically. But if you see bearing play, hear a growl that changes with speed, or the tone ring is integrated into the hub and looks damaged, hub replacement becomes more likely.
Is an OEM wheel speed sensor necessary?
Not always, but some vehicles are sensitive to signal quality. If you’ve had repeat issues with a bargain sensor, switching to OEM or a higher-quality brand can be a practical move.
If you want the “less guesswork” route
If you’re trying to fix a recurring ABS light and you’d rather not keep swapping parts, a local shop that can graph wheel speed signals and inspect the hub/tone ring can usually pinpoint whether you’re dealing with wiring, sensor seating, or a bearing-related problem.