
How to use touch up paint on car comes down to two things most people skip: prep that’s actually clean, and patience between thin coats. If you rush either one, the repair tends to look like a blob, or it flakes a few weeks later.
Touch-up paint is worth doing because small chips can turn into rust spots, especially around hood edges, door seams, and wheel arches. Even if you’re not chasing a showroom finish, sealing exposed metal usually beats leaving it open to water and road salt.
This guide walks you through choosing the right paint, prepping the spot, applying paint and clear coat, and blending so the repair looks “normal” from a few feet away, which is the goal for most daily drivers.
Pick the right touch-up paint (and why matching goes wrong)
The most common failure isn’t technique, it’s color mismatch. Your car’s paint has aged from sun and weather, and many colors have multiple factory variants that look “close” in the bottle but not on the panel.
Here’s what usually works in the U.S. market:
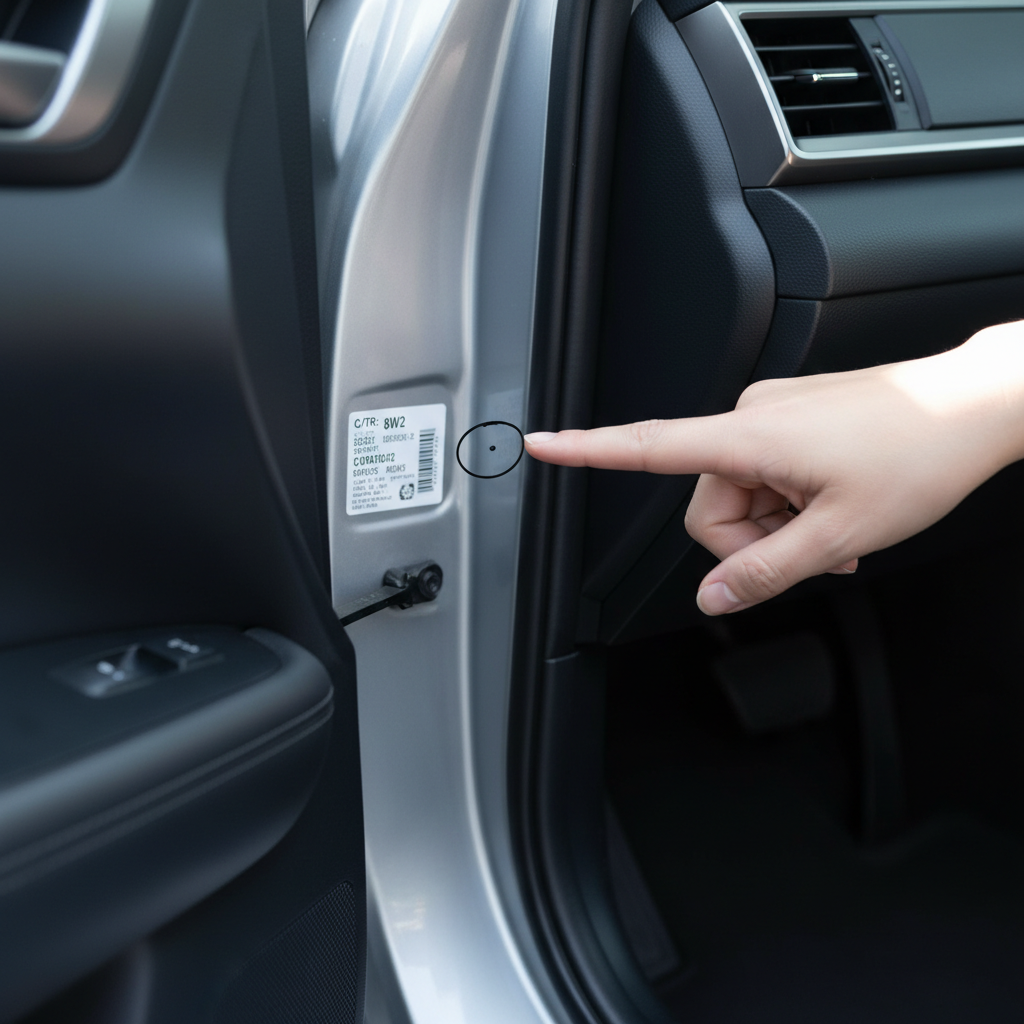
- Use the paint code, not “black” or “silver.” The code is often on the driver door jamb label, under the hood, or in the trunk area (location varies by brand).
- Buy the same system: base coat for color + clear coat for gloss on most modern cars (many are base/clear).
- Choose the right format: a fine brush for chips, a pen tip for tiny pinpricks, and a small bottle for multiple spots. Some kits include both brush and pen.
- Plan for blending limits: metallic and pearl finishes are harder because flake orientation affects how light reflects. A small chip is doable, a large scratch across a panel may stay visible.
According to DuPont Refinish (a major automotive coatings brand), accurate color match depends on the correct formula and proper application technique, especially with effect colors like metallics and pearls. That’s a polite way of saying “close enough” paint plus sloppy coats rarely blends.
Tools and materials you’ll want before you start
Touch-up jobs go smoother when you don’t improvise mid-repair. This short list covers most situations.
- Car wash soap and clean microfiber towels
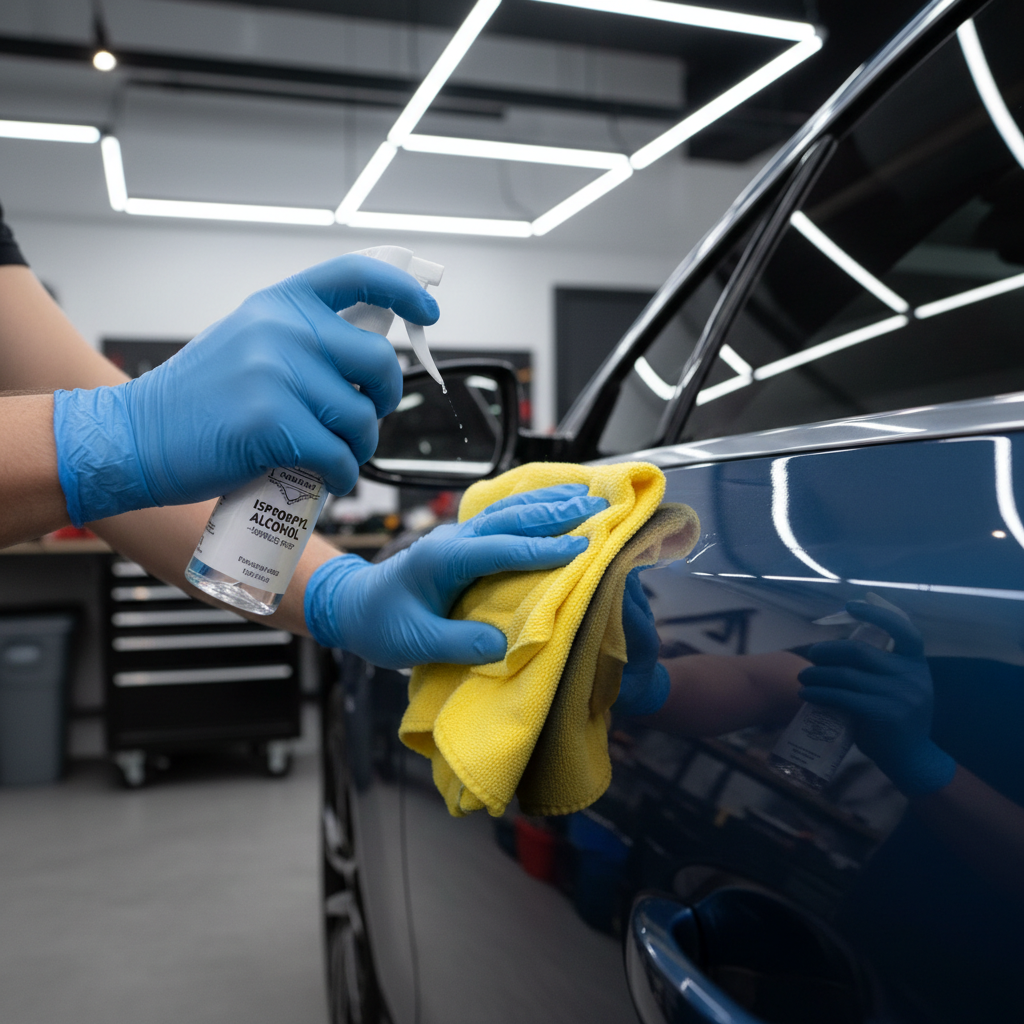
- Isopropyl alcohol (or wax/grease remover) for final wipe
- Touch-up base color and (if needed) clear coat
- Fine-tip applicators: toothpicks, micro brushes, or the included brush
- Masking tape (optional, for nearby edges)
- Sandpaper: 2000–3000 grit wet/dry (only if you’ll level)
- Rubbing compound and finishing polish (optional, for blending)
- Nitrile gloves and good ventilation
Safety note: solvents and clear coat fumes can irritate lungs and skin. Work in a ventilated area, avoid open flames, and if you’re sensitive to fumes, consider a respirator rated for organic vapors or ask a professional shop for help.
Quick decision table: chip, scratch, or down-to-metal?
Not every mark needs the same approach. Use this to pick the minimum steps that still hold up.
| Damage type | What it looks like | Recommended approach | Realistic expectation |
|---|---|---|---|
| Clear-coat scuff | Looks white/hazy, color underneath intact | Polish first, touch-up only if color is missing | Often improves a lot without paint |
| Paint chip (no bare metal) | Small crater, primer showing | Clean, dab base coat in thin layers, add clear coat | Looks good from a few feet away |
| Down to bare metal | Silver metal visible, sharp edges | Clean, remove rust if any, consider primer, then base + clear | Protection matters more than perfect blend |
| Long scratch across panel | Line through color, may catch fingernail | May need sanding and wider blend, sometimes body shop | Touch-up reduces noticeability, not “invisible” |
Prep work that makes touch-up paint actually stick
If there’s one “unsexy” part to do right, it’s this. Poor prep is why people think touch-up paint “doesn’t work.”
Do this in order:
- Wash the area with car soap, rinse, dry fully. You want grit gone, not dragged into the chip.
- Degrease with isopropyl alcohol or wax/grease remover. Wax residue can cause fisheyes (tiny craters) in the paint.
- Remove loose edges. If paint is flaking, gently lift only what’s already detached. Don’t pick aggressively.
- Address rust if present. Light surface rust can sometimes be gently removed; heavier rust often needs more than touch-up. If you see bubbling paint, that’s usually beyond a simple dab.
- Dry time matters. Moisture trapped in the chip can cloud clear coat or cause adhesion issues.
Temperature and humidity matter too. Many touch-up products behave better around typical room temps. If it’s cold outside, paint can thicken and leave texture; if it’s very humid, clear coat may haze.
How to apply touch-up paint (thin layers beat one thick blob)
When people ask how to use touch up paint on car without leaving a raised dot, the answer is: think “build up,” not “fill it all at once.”
Step-by-step application
- Shake and mix: pens and bottles separate. Shake per instructions, then let bubbles settle for a minute.
- Test on something else: a piece of plastic or cardboard helps confirm color and flow before you touch the car.
- Use a micro-applicator: for tiny chips, a toothpick or micro brush often gives more control than the included brush.
- Dab, don’t brush: place paint into the chip and let it level. Brushing tends to leave streaks and pulls paint onto surrounding clear.
- Keep coats thin: apply a light layer, wait the recommended dry time, repeat until the chip is nearly level.
If your kit includes clear coat, apply it after the color flashes dry (follow product timing). Clear coat adds gloss and UV protection, and it helps the repair look less “matte dot” on many finishes.
According to 3M (automotive refinish and abrasives manufacturer), surface cleanliness and correct layering are key to adhesion and appearance in refinishing work. Touch-up is the small-scale version of the same principle.
Leveling and blending: make it look normal, not perfect
This is optional, but it’s what moves a repair from “obvious” to “hard to notice.” The catch: you can also damage surrounding clear coat if you rush.
What usually works for small chips:
- Wait for cure: many products feel dry quickly but cure slower. If you sand too soon, the paint can roll up or smear. Follow label guidance, and when in doubt, wait longer.
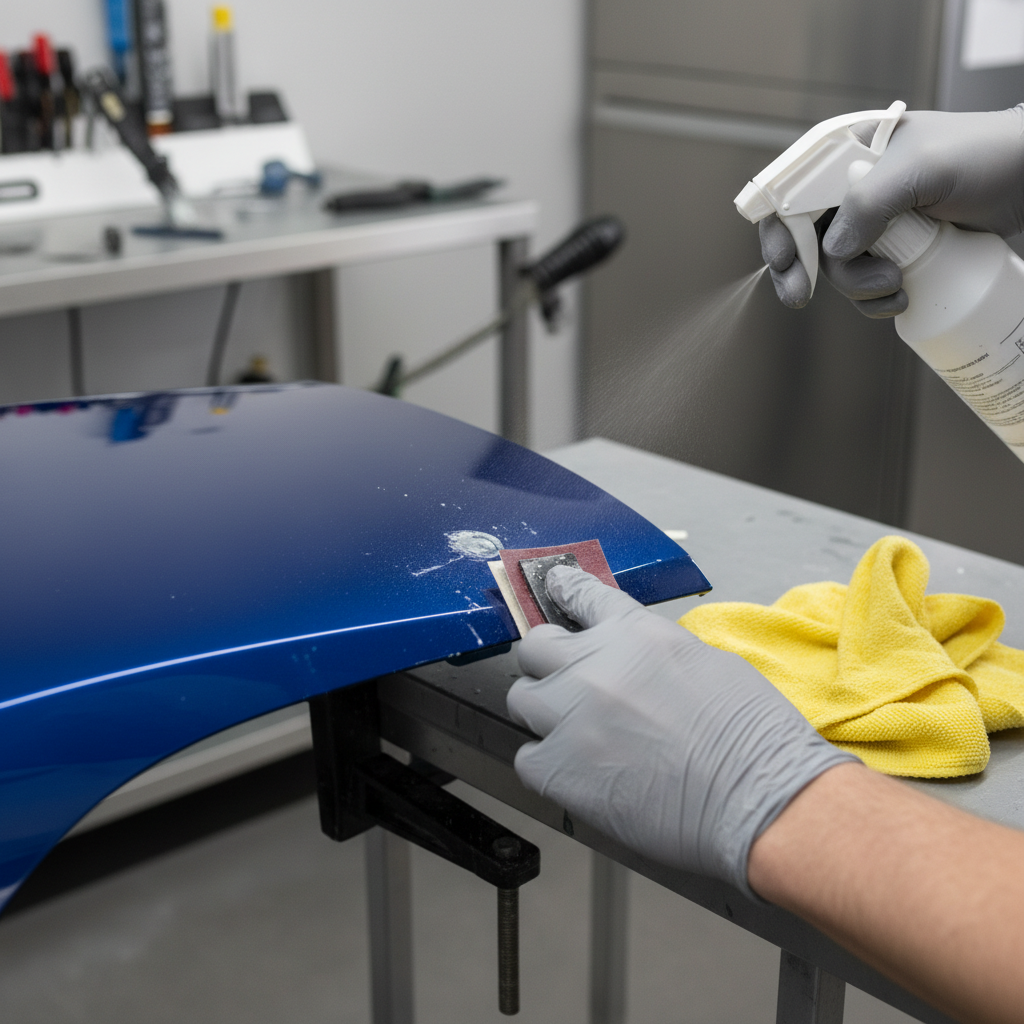
- Wet sand lightly (advanced): use 2500–3000 grit with plenty of water, focusing on the high spot of the touch-up. Stop early; you can always do a little more.
- Compound, then polish: compound removes sanding haze, polish restores gloss. Use light pressure and small sections.
If you’ve never wet-sanded clear coat before, consider skipping leveling on your first attempt. A slightly raised but sealed chip often beats an over-sanded spot that turns dull.
Common mistakes that make touch-up repairs look worse
A few patterns show up again and again, even with good paint.
- Painting over wax: the repair fisheyes or peels. Degreasing fixes most of this.
- Too much paint: thick drops shrink, crack, or look like a “pimple.” Thin coats blend better.
- Skipping clear coat where it’s needed: color looks flat compared to surrounding gloss.
- Trying to fix a large area with a pen: touch-up is for small chips and narrow scratches, not quarter-panel resprays.
- Judging color indoors: garage lighting hides mismatch. Check outside in shade and indirect sun.
One more subtle one: metallic colors can darken or lighten based on how the paint lays. Dabbing is safer than brushing for keeping the flake pattern from streaking.
When you should stop and consider a body shop
Touch-up paint is a smart DIY move for small damage, but some cases cross the line where professional tools matter.
- Rust bubbles or soft, swollen paint: rust is likely spreading underneath, and sealing the top may trap moisture.
- Damage on plastic bumpers with peeling clear: adhesion promoters and flexible additives may be needed, depending on product.
- Deep scratches across a wide area: proper blending often requires sanding and spraying beyond the scratch.
- Lease return concerns: standards vary, and a visible DIY blob can sometimes count against you.
If you’re unsure, many shops will give a quick opinion. It’s not always expensive, and it can save you from repainting a larger area after a DIY misstep.
Key takeaways before you start
- Match by paint code, and expect metallics to be less forgiving.
- Prep and degrease like you mean it, most failures start here.
- Apply thin layers, let them dry, then add clear coat if your finish needs it.
- Blend only if you’re comfortable with wet sanding and polishing, otherwise stop at “sealed and tidy.”
Conclusion: a clean, sealed chip beats a perfect-looking guess
Once you learn how to use touch up paint on car panels with thin coats and proper prep, most small chips become a quick weekend task instead of an eyesore you keep noticing at every stoplight. Pick the right color, keep the repair small and controlled, and give it time to dry before you judge the result.
If you want a simple next step, start with one small chip in an inconspicuous area, take notes on dry times, and only then move to the spots you see every day.