
How to replace car windshield wiper motor is a job many DIYers can handle when the wipers move slowly, stop mid-sweep, or you hear the motor click but the arms barely budge.
The value is simple: a working wiper system is basic safety, and a failed motor can leave you stuck in rain or road spray with almost no warning. The tricky part is that “dead wipers” are not always a dead motor, sometimes it’s a blown fuse, a failing switch, or stripped linkage.
This guide helps you sort the common causes fast, confirm the motor is actually the issue, then replace it step by step without breaking the cowl clips or misaligning the wiper arms. You’ll also see where people waste time, like swapping the motor when the linkage is seized.
Before you replace anything: quick diagnosis that saves money
If you jump straight into how to replace car windshield wiper motor without verifying the failure, you can end up with a new motor and the same problem. A few checks usually narrow it down in minutes.
- No movement, no sound: often fuse, relay, wiring, or switch.
- Clicking/humming but no arm movement: motor may run but linkage is disconnected, stripped, or jammed.
- Slow wipers: binding linkage, weak motor, corrosion at pivots, low voltage, or failing ground.
- Works on one speed only: switch issue, resistor/control module, or motor internal park circuit depending on design.
According to NHTSA, clear visibility is a core safety factor for drivers, so if your wipers fail intermittently, treat it as a fix-soon item rather than “I’ll get to it later.”
Fast checks you can do with basic tools
- Check the wiper fuse and any labeled wiper relay in the under-hood/under-dash fuse box.
- Confirm the wiper arms are not frozen to the windshield, and the blades are not stuck under ice.
- Try moving the wiper arms gently by hand (with ignition off). If they feel locked solid, the linkage may be binding.
- If available, use a multimeter at the motor connector to see if power and ground show up when the switch is on.
If you get power at the connector and the ground looks solid but the motor won’t run, replacement is usually reasonable. If there’s no power, you may be chasing electrical upstream.
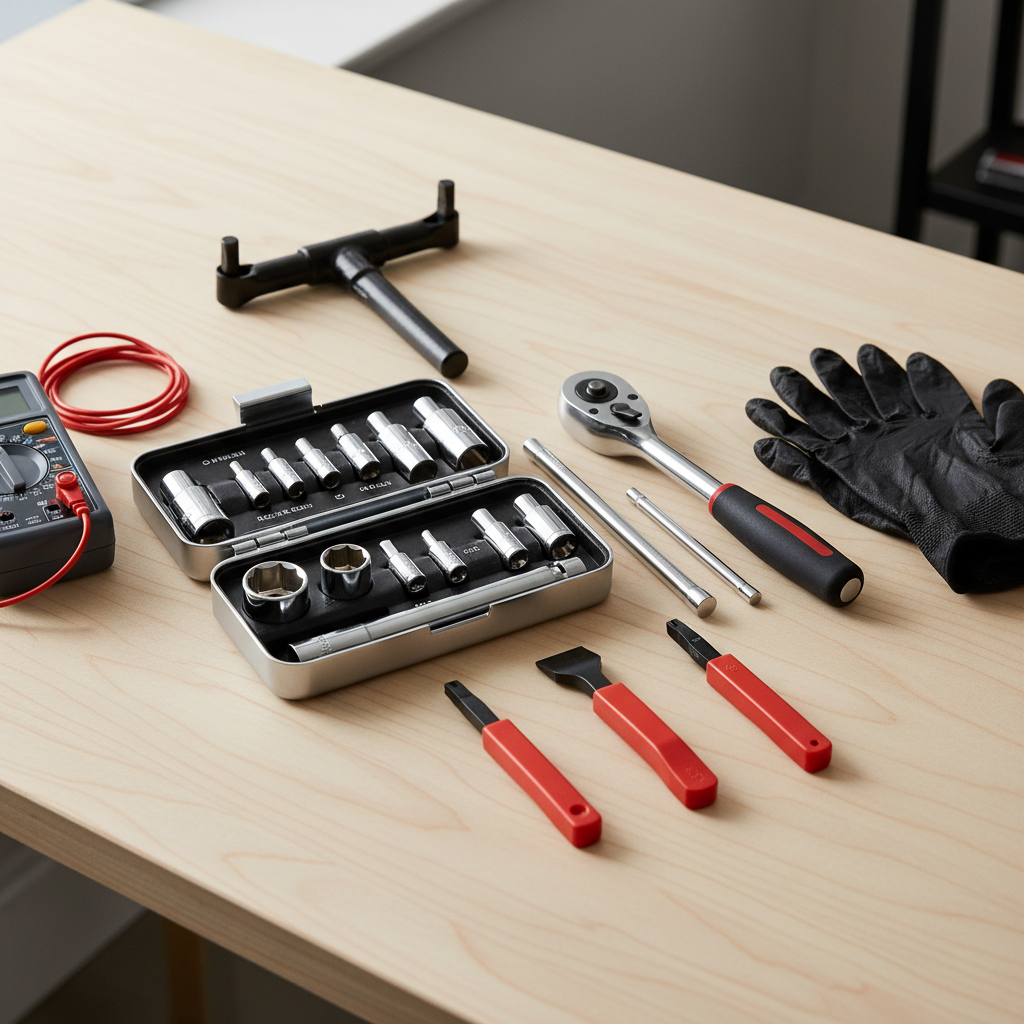
Tools, parts, and time: what most people actually need
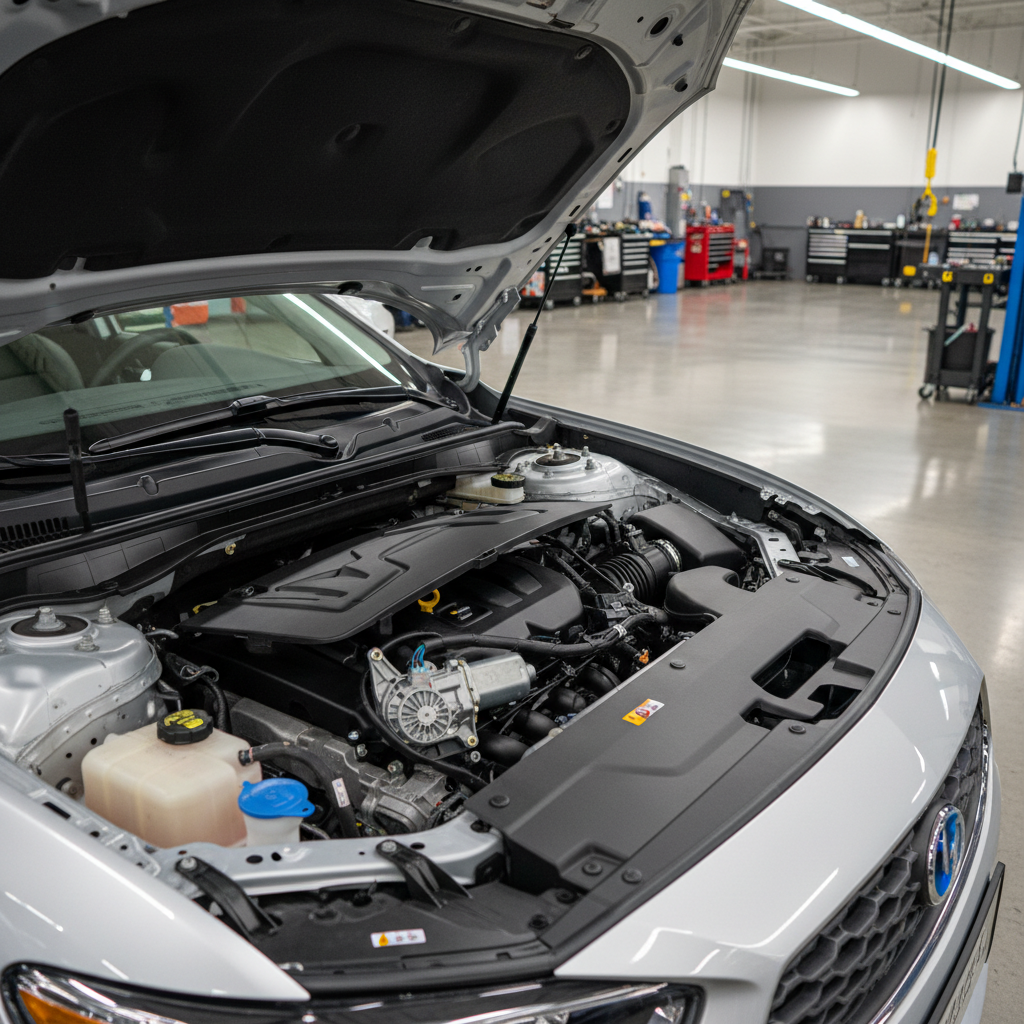
Most vehicles place the wiper motor under the plastic cowl at the base of the windshield. Access varies a lot by model, but the tool list stays pretty similar.
| Item | Why you need it | Notes |
|---|---|---|
| Socket set (metric/SAE) | Remove wiper nuts, cowl fasteners, motor bolts | Common sizes: 10mm, 13mm, 14mm |
| Trim clip tool / flat plastic pry tool | Lift cowl clips without snapping them | Metal screwdrivers can gouge plastic |
| Wiper arm puller (optional) | Free stuck wiper arms from splines | Worth it if arms won’t wiggle off |
| Torque wrench (nice to have) | Re-tighten arm nuts correctly | Don’t over-tighten and strip studs |
| Replacement wiper motor | Core part | Match by VIN/fitment, connectors vary |
Time estimate: many cars land in the 60–150 minute range. Rust, brittle clips, and tight cowl space are what stretch it out.
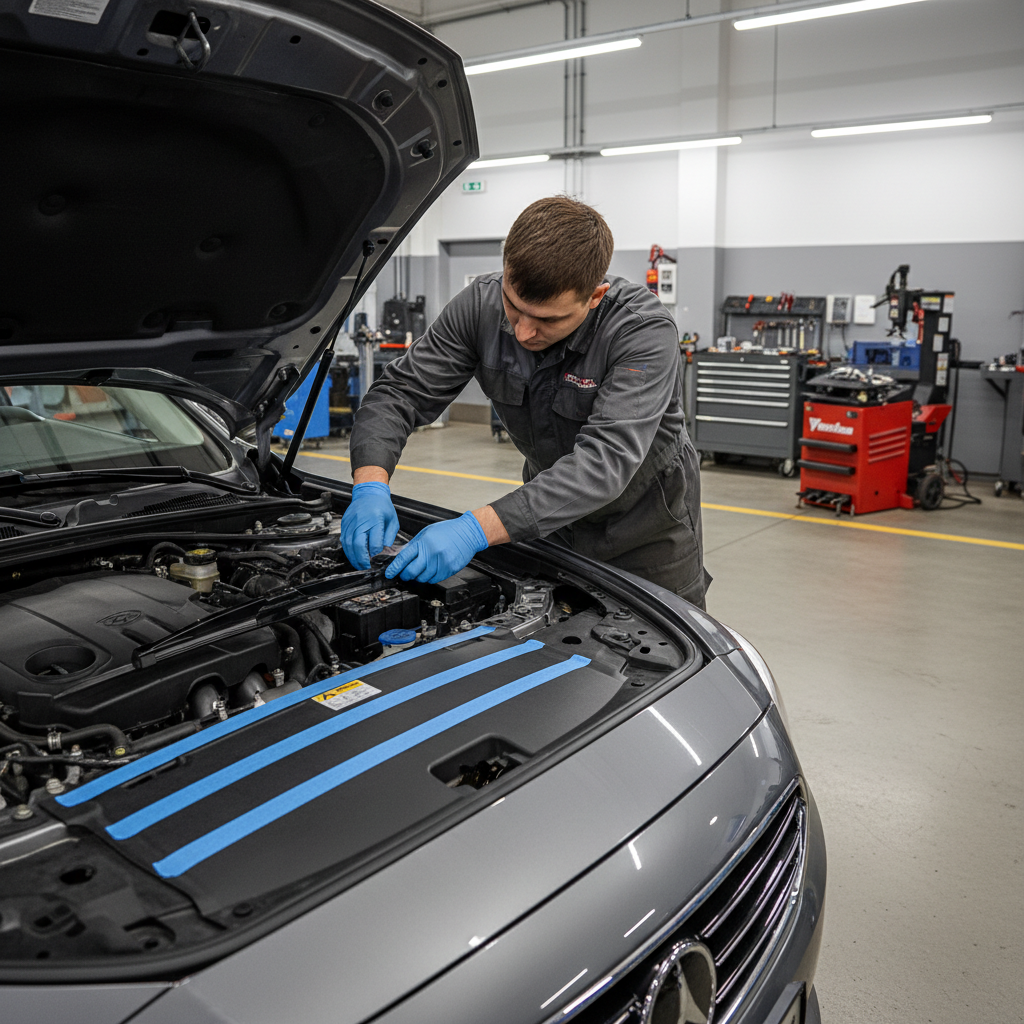
Safety and setup (small steps that prevent big headaches)
Wiper systems have pinch points and can move unexpectedly if the switch gets bumped. A couple habits reduce risk and keep alignment correct.
- Park on level ground, set parking brake.
- Turn ignition off and remove the key, then disconnect the negative battery terminal if your vehicle manual recommends it for electrical work.
- Mark the wiper arm resting position with painter’s tape on the windshield, left and right. This makes reassembly much less annoying.
- Lay a towel at the cowl edge to protect paint and glass.
For model-specific cautions (airbag sensors near the cowl, special “service position” wipers), your owner’s manual or service information is the right reference. According to AAA, using the correct procedure from your vehicle documentation helps avoid preventable damage during DIY repairs.
Step-by-step: how to replace a car windshield wiper motor
The exact fastener locations differ, but the workflow is consistent: remove arms, open the cowl area, disconnect linkage, swap motor, then realign.
1) Remove the wiper arms
- Pop off the plastic nut caps (if present).
- Remove the retaining nuts.
- Rock the arms gently to break them free from the splines. If they’re stubborn, use a wiper arm puller to avoid bending the arm.
Tip: keep left/right arms oriented so they go back to the same side, some are subtly different.
2) Remove the cowl cover and weather strip
- Pull off the rubber weather strip along the rear of the engine bay if it blocks the cowl.
- Remove push clips, screws, and any washer hose retainers.
- Lift the cowl panel carefully, plastic can crack when cold.
If your washer hose routes through the cowl, disconnect it gently and remember the routing so it doesn’t kink on reinstall.
3) Locate the motor and linkage assembly
You’ll usually see a motor bolted to the body with a linkage (also called the transmission) connecting to the wiper pivots. Look for obvious problems like a linkage arm popped off a ball stud.
- If the linkage is disconnected, the motor may be fine.
- If the linkage is stiff or seized, the motor may have failed from overload, but you still need to fix the binding.
4) Disconnect the electrical connector
- Press the tab and pull straight out.
- If it feels glued in, check for a secondary lock or red tab, don’t yank the wires.
Quick sanity check: inspect for corrosion, bent pins, or water intrusion. That’s a common “it wasn’t the motor” clue.
5) Separate the motor from the linkage (varies by design)
Some vehicles let you remove the motor alone; others want the motor and linkage out as a unit.
- If it’s a ball-socket linkage, pry carefully at the socket with a suitable tool to pop it free.
- If it’s a bolted linkage, remove the linkage fastener at the motor crank.
Don’t rotate the new motor randomly before installation, the “park” position matters for where your wipers stop.
6) Remove the motor mounting bolts and swap the motor
- Remove the motor bolts (typically 3).
- Transfer any brackets, rubber isolators, or heat shields to the new unit.
- Install the new motor and hand-start bolts to avoid cross-threading, then tighten snugly.
7) Reconnect linkage and confirm free movement
Before you close everything up, make sure the linkage moves smoothly by hand through a small range. If it binds, fix that now or the new motor may struggle.
8) Test motor “park” and wiper sweep before reinstalling arms
- Reconnect the electrical connector.
- Reconnect the battery if you disconnected it.
- Cycle wipers on/off once so the motor returns to its park position.
Turn ignition off again before putting arms back on.
9) Reinstall wiper arms and align using your tape marks
- Set each arm on the splines aligned to the tape marks.
- Tighten nuts, then snap caps back on.
- Run wipers with washer fluid and confirm full sweep without hitting the cowl or A-pillars.
Quick self-check: do you really need a new motor?
If you’re on the fence, this checklist tends to separate motor problems from everything else.
- Likely motor: correct power/ground at connector when switch is on, motor does nothing or smells hot, intermittent stall that returns after cooling.
- Likely linkage issue: motor runs but arms don’t move, arms move then jam, loud clunking, one wiper out of sync.
- Likely electrical upstream: no power at motor connector, multiple wiper functions dead (mist/washer/interval), problem changes when you jiggle stalk or harness.
According to Bosch (automotive supplier), worn wiper system components and poor blade contact can reduce visibility, so if you’re already in there, it’s reasonable to inspect pivots and replace worn blades too.
Common mistakes that cause repeat failures
- Forgetting alignment: skipping tape marks often leads to wipers parking too high or sweeping off the glass edge.
- Breaking cowl clips: rushing the cowl removal can create rattles and water leaks near the cabin filter area.
- Ignoring binding linkage: a stiff pivot can overload a fresh motor and shorten its life.
- Assuming “new” equals “good”: verify connector pins match and the motor parks correctly before full reassembly.
- Dry running wipers on glass: testing without washer fluid can chatter and mislead you into thinking the sweep is wrong.
When it’s smarter to get professional help
DIY makes sense when access is straightforward and you can verify power/ground. But there are cases where a shop saves time and avoids collateral damage.
- You see corrosion in the harness connector or water intrusion and need wiring repair.
- The wiper system is controlled by a body control module and symptoms suggest programming or module faults.
- The linkage is seized and wiper pivots need pressing out or cowl area disassembly is extensive.
- You’re not comfortable testing voltage safely with the engine bay open.
If you suspect deeper electrical issues, consider a qualified technician, because misdiagnosis can get expensive fast.
Key takeaways and a practical next step
If your diagnosis points to a failed motor and the linkage moves freely, replacing it is usually a clean, satisfying repair. The two spots that decide success are confirming power/ground before buying parts and getting the park position and arm alignment right during reassembly.
Next step: run the quick checklist, then plan the job with the right clips/tools on hand so you’re not stuck mid-project with a half-removed cowl.
FAQ
How do I know if my windshield wiper motor is bad or it’s just a fuse?
If the fuse is blown and replacing it restores normal operation, the motor may be fine, but a repeat blown fuse can indicate a binding linkage or short. If the fuse is good and you have power at the motor connector with the switch on, the motor becomes a stronger suspect.
Can a windshield wiper motor work but the wipers still don’t move?
Yes, that’s common when the linkage pops off, the crank arm strips, or a bushing fails. You may hear the motor running while the arms stay still, or one arm moves and the other lags.
Do I need to disconnect the battery to replace a wiper motor?
Many DIYers do, especially to prevent accidental movement while hands are near linkage. Some vehicles may have memory settings to consider, so check your owner’s manual for guidance and any radio/security precautions.
Why do my new wipers park in the wrong position after motor replacement?
Usually the arms were installed on the splines in the wrong resting spot, or the motor wasn’t allowed to return to its park position before the arms went back on. Cycling the motor once to park, then aligning to tape marks, typically fixes it.
How long does it take to replace a car windshield wiper motor?
Access is the deciding factor. If the cowl comes off easily and the motor is exposed, it can be around an hour; if clips are brittle, arms are seized on splines, or the linkage must come out as an assembly, expect longer.
Should I replace the wiper linkage when I replace the motor?
Not always. If the linkage is tight, noisy, or has obvious play, it’s worth considering because a binding linkage can overload a new motor. If it moves smoothly and joints look solid, you can often keep it.
What if I replaced the motor and the wipers still don’t work?
Recheck the connector seating, fuses/relays, and whether the ground is clean. If there’s no voltage at the connector under command, the issue may be the switch, wiring, or control module, and a professional diagnostic may be the fastest path.
If you’re doing how to replace car windshield wiper motor on a vehicle with tight cowl packaging or unclear wiring, and you’d rather avoid trial-and-error, a model-specific repair guide or a quick diagnostic at a reputable shop can be a more predictable way to get back reliable wipers.