
how to diagnose car bad camshaft sensor symptoms usually comes down to one thing: separating a real sensor failure from wiring, timing, or fuel/ignition problems that just look the same.
If your car is cranking longer than normal, stumbling at idle, losing power under load, or flashing a check engine light, the camshaft position sensor often ends up on the suspect list, but it should rarely be the first part you throw at the problem.

That matters because misdiagnosis is expensive in a sneaky way, you can replace a sensor and still have the same rough running if the real issue is a stretched timing chain, a damaged connector, or low battery voltage during cranking.
Below is a practical way to diagnose the symptoms, what to check in what order, and when it’s smarter to stop and get a pro involved.
What the camshaft position sensor does (and why failure feels “random”)
The camshaft position sensor tells the engine computer where the camshaft sits in its rotation, in plain English, it helps the car time fuel injection and spark events correctly and confirm the engine is in sync.
When the signal drops out or becomes noisy, the ECU may guess, fall back to a default strategy, or cut power to protect the engine, so symptoms can be intermittent and change with heat, vibration, and RPM.
- Intermittent stalling can happen when the signal briefly disappears.
- Hard starts often show up because the ECU struggles to time injection during cranking.
- Reduced power can appear if the ECU enters a limp strategy.
Most common bad camshaft sensor symptoms (and what else can mimic them)
When people search how to diagnose car bad camshaft sensor symptoms, they usually want a clean list. Here it is, with the “look-alikes” that often fool DIYers.
- Check Engine Light with cam correlation or sensor circuit codes, look-alikes include a loose connector, rubbed-through harness, or low system voltage.
- Extended cranking or no-start, look-alikes include weak battery, failing starter, low fuel pressure, or crankshaft position sensor issues.
- Rough idle and misfires, look-alikes include vacuum leaks, worn spark plugs, ignition coils, or injector problems.
- Hesitation, poor acceleration, look-alikes include clogged catalytic converter, MAF/MAP faults, or transmission issues depending on the feel.
- Stalling at stops, look-alikes include dirty throttle body, idle air control issues (on older cars), or EVAP purge valve stuck open.
Quick self-check: are you in a “sensor likely” scenario?
This checklist is meant to help you decide whether to keep focusing on the cam sensor or widen the net.
- The symptom is heat-related (worse after warm-up, better when cold).
- The problem is intermittent and hard to reproduce, especially over bumps.
- You have a code that references camshaft position sensor circuit or cam/crank correlation.
- Wiggling the harness near the sensor changes idle quality or triggers a stumble.
- You recently had engine work near timing components, valve cover, or harness routing.
If none of these fit and you mainly have global symptoms like low power all the time, start by checking basics like air filter, plugs, fuel trims, and vacuum leaks, because a cam sensor is not the only part that can set confusing timing-related codes.
Step-by-step diagnosis: scan tool, visual checks, and simple tests
According to NHTSA, a flashing malfunction indicator light typically signals an active misfire that can damage the catalytic converter, so if the light is flashing, reduce load and consider getting it checked promptly.
Here’s a grounded flow that works for most vehicles, even if you only have a basic scanner.
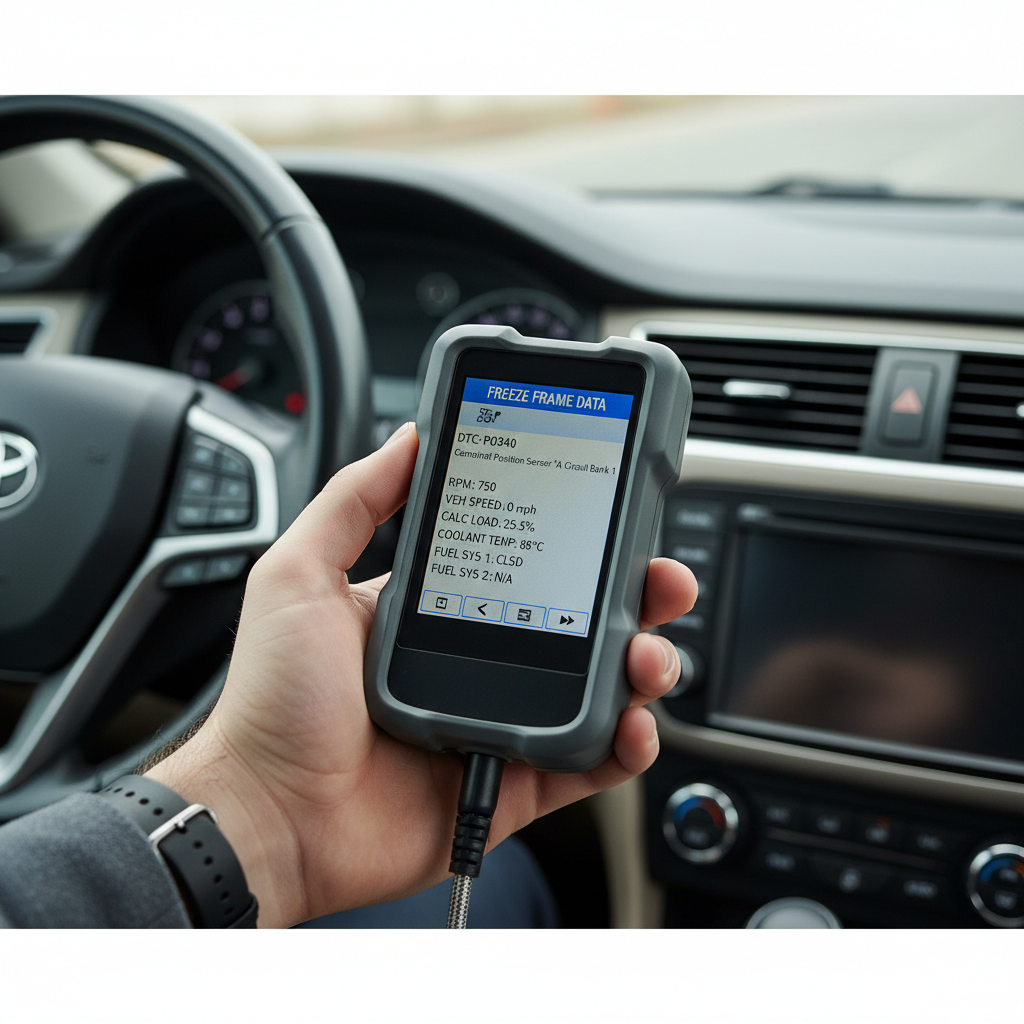
1) Pull codes and freeze-frame data
Write down codes and the freeze-frame snapshot (coolant temp, RPM, vehicle speed). Codes commonly associated with cam sensor problems include P0340, P0341, and correlation codes like P0016, but the exact set varies by make.
- Circuit codes point you toward wiring, connector, power/ground, or the sensor itself.
- Correlation codes can be sensor-related, but also timing chain/belt stretch, VVT issues, or mechanical timing errors.
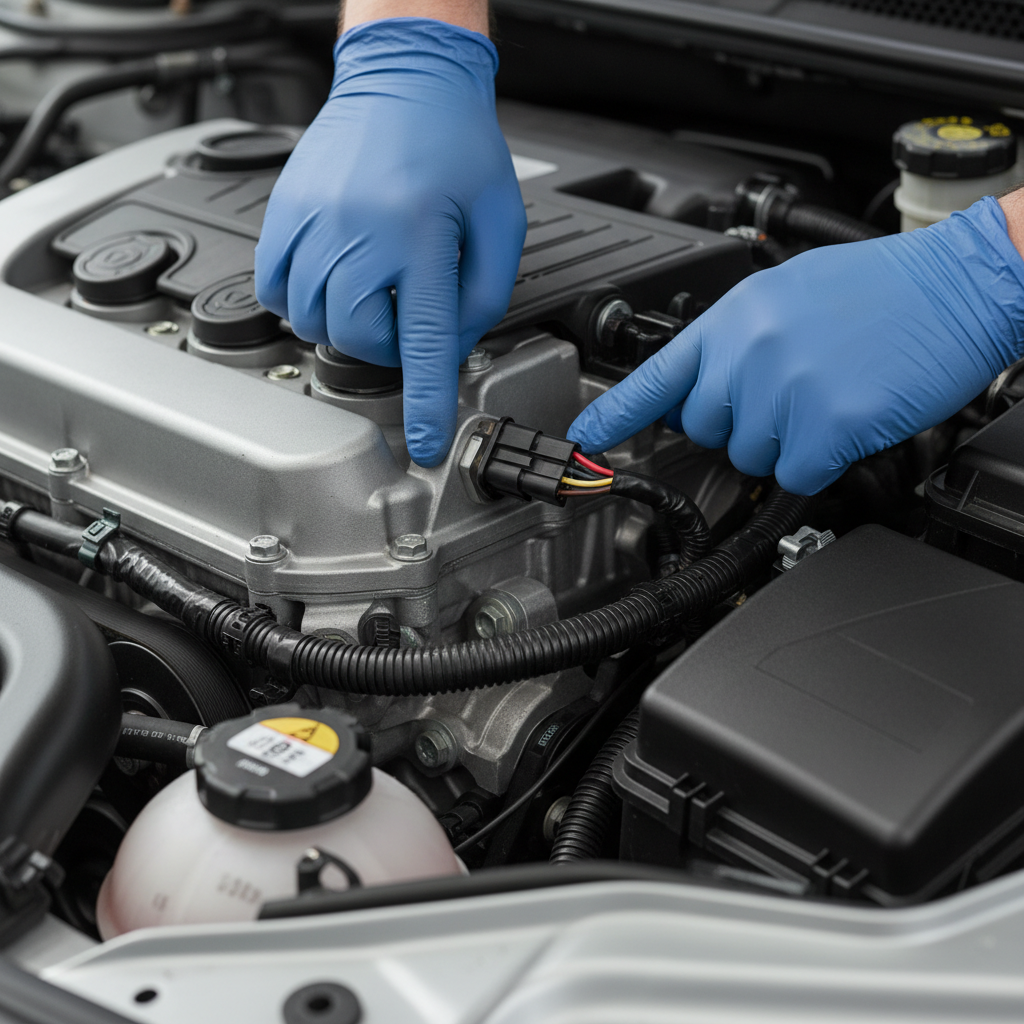
2) Do a fast visual inspection before touching parts
This step looks boring, but it saves the most money.
- Check the sensor connector for oil intrusion, broken locks, bent pins, or green corrosion.
- Inspect harness routing for chafing near brackets, valve covers, and serpentine belt paths.
- Look for oil leaks that can contaminate connectors, especially around valve cover gaskets.
If you find a damaged connector or exposed wiring, fix that first. A perfect new sensor still fails if the signal wire opens under vibration.
3) Watch live data while recreating the symptom
Many scan tools can show camshaft position (or “cam sync”) and RPM. If the cam signal drops out while RPM stays steady, that’s a strong clue.
- At idle, look for stable readings rather than jumping values.
- During a stumble, watch whether the cam PID flatlines, goes implausible, or loses sync.
Not every car exposes great cam data on a cheap scanner, so don’t panic if you can’t see it, just move on to the next steps.
4) Basic electrical checks (DIY-friendly)
If you have a multimeter, you can do meaningful checks without guessing.
- Verify power and ground at the connector with key on (specs vary, often 5V reference or 12V supply depending on design).
- Check for wiggle-test failures: keep leads in place and gently move the harness, voltage should not drop out.
- Look for short to ground or short to power if you have a wiring diagram.
If power/ground is missing, the sensor may be innocent. That’s when you trace fuses, shared reference circuits, and ground points.
5) Decide if you need a scope or advanced tool
A lab scope can confirm if the waveform is clean or noisy, which is the gold standard for tricky cases. Many DIYers don’t own one, and that’s okay, but if you’ve reached this point with intermittent symptoms, a shop that can scope the cam and crank together often diagnoses faster.
Cam sensor vs. timing or VVT problems: a practical comparison
The trap is assuming any “cam” code means the sensor. In real shops, correlation faults often turn into timing or VVT investigations.
| What you see | More consistent with sensor/wiring | More consistent with timing/VVT |
|---|---|---|
| Symptom comes and goes with bumps or harness movement | Yes | Usually no |
| Code mentions circuit/open/short | Yes | No |
| Rattle at startup, especially cold | Not typical | Possible timing chain issue |
| Oil sludge, overdue oil changes, VVT performance codes | Maybe | Common |
| Live cam sync drops out while RPM stays stable | Common | Less common |
| Persistent correlation codes after sensor replacement | Less likely | More likely |
Fix options by scenario (what actually works)
Once you’ve narrowed it down, the “right fix” depends on what you found, not on the code description.
If the connector or harness is compromised
- Repair damaged wires with proper splices and heat-shrink, avoid twist-and-tape fixes.
- Replace broken connector housings or terminals when pin tension feels loose.
- Secure routing away from heat and sharp edges, then clear codes and road-test.
If the sensor itself tests bad or behaves intermittently
- Use an OE or high-quality equivalent sensor, cheap sensors can create new problems that look like “ECU issues.”
- Clean the mounting area and confirm the sensor seats fully, incorrect air gap can matter on some designs.
- Clear codes, then verify with a longer drive cycle, not just a quick idle test.
If you suspect timing/VVT or mechanical issues
- Check oil level and condition, VVT systems hate low or dirty oil.
- Look for related codes (cam timing over-advanced/retarded, VVT solenoid performance).
- If correlation codes persist, consider a professional inspection for timing chain stretch, jumped timing, or phaser issues.
Common mistakes that waste time (and how to avoid them)
- Replacing parts off a code alone, a code tells you where the computer noticed a problem, not which part failed.
- Ignoring battery and charging health, low cranking voltage can cause sensor dropouts and weird sync behavior.
- Skipping freeze-frame notes, temperature and RPM context often reveals heat soak or high-load triggers.
- Assuming “runs fine now” means fixed, intermittent sensor faults can disappear for days, then come back.
If you’re trying to diagnose in a driveway, focus on repeatability: same condition, same test, same result. That’s what turns a guess into a diagnosis.
When to stop DIY and call a professional
If the car stalls in traffic, won’t restart reliably, or shows a flashing check engine light, it’s reasonable to get professional help. Not because DIY is “bad,” but because confirming cam/crank synchronization and mechanical timing often needs a scope, service information, and sometimes intrusive inspection.
- You replaced the sensor and the same correlation code returns.
- The engine has unusual noises, like a rattle on startup, which can be a mechanical timing concern.
- You see oil contamination inside connectors repeatedly, which may require sealing and leak repair.
Key takeaways you can use today
- Start with codes plus freeze-frame, then confirm with visual and electrical checks.
- Circuit codes often mean wiring/connector/power issues, not automatically a bad sensor.
- Correlation codes can point to timing chain, VVT, or mechanical alignment problems.
- When in doubt, replicate the symptom and watch live data, it’s the fastest way to stop guessing.
Conclusion
Diagnosing this fault is less about memorizing symptoms and more about proving whether the cam signal is missing, noisy, or simply out of sync with the crank. If you work through the checks in order, you’ll usually figure out whether you’re dealing with a sensor, a wiring problem, or something deeper like VVT or timing.
If you want a simple next step, pull codes and freeze-frame tonight, then do a connector and harness inspection before buying anything. That one move prevents most wasted parts swaps.
FAQ
What codes are most related to camshaft position sensor problems?
P0340 and P0341 are common on many makes, plus cam/crank correlation codes like P0016. The exact meaning depends on the vehicle, so read the code description and look at freeze-frame context.
Can a bad camshaft sensor cause a car to not start?
Yes, it can, especially if the ECU can’t confirm cam position during cranking. That said, weak battery voltage, a crank sensor issue, or fuel delivery problems can create a similar no-start, so testing matters.
How do I know if it’s the cam sensor or the crank sensor?
If RPM on the scanner drops to zero while cranking, the crank signal is often the first suspect. If RPM looks normal but cam sync drops out, the cam circuit becomes more likely, though vehicle design varies.
Will replacing the camshaft position sensor clear the check engine light?
Sometimes, but the light clears because the underlying fault stops, not because a new part was installed. Clear codes after the repair, then confirm with a drive cycle to see if the monitor runs clean.
Can low oil or dirty oil trigger cam sensor-like symptoms?
It can, especially on engines with variable valve timing, because oil pressure and cleanliness affect phasers and solenoids. That often shows up as timing performance codes alongside drivability issues.
Is it safe to drive with bad camshaft sensor symptoms?
It depends on severity. Occasional roughness might get you to a shop, but stalling, severe misfires, or a flashing check engine light suggests risk to the catalytic converter or safety in traffic, so driving should be minimized.
Do I need a multimeter to diagnose this, or is a scanner enough?
A scanner gets you codes, freeze-frame, and sometimes live data, which is a great start. A multimeter helps confirm power, ground, and harness integrity, which is often where the real issue hides.
Want a more streamlined path?
If you’re trying to diagnose an intermittent issue and you’d rather not buy parts on a hunch, a shop or mobile diagnostician with a lab scope can compare cam and crank signals quickly. Bring your code list, freeze-frame notes, and what conditions trigger the symptom, that context often cuts diagnostic time down.